Contributors

Showing posts with label DIY. Show all posts

Friday, July 13, 2012

Slime

 I saw on Pinterest a recipe for homemade slime so thought I would give it a try. Super easy...white glue, water and borax. They love it. Had a great time playing with it. Only negative is that if it touches fabric it doesn't come off real great (had to cut a little bit of my rug out because of a plop landing on it)


House projects

Got a urge to do some little projects at the house. 
This is our door from garage into house. It was getting pretty dirty from all my paint projects happening in the garage and then clean up in the house (which thankfully will end soon since I am putting in a utility sink in the laundry area outside).

Painted the door with chalk paint so now we can write messages and fun things whenever we want. It makes me smile. :) 

Took about 30 minutes, if that to do. Took two coats of chalkboard paint from Home Depot.


 I also painted Dylan's sliding closet doors with chalkboard paint and hung them back up.
Super fun. I have a feeling it is going to be good entertainment for the kids. :)

Monday, June 18, 2012

Estate Sale

 I bought my 1st estate sale left overs! It was actually from a house that I had shown to a client for real estate. There was a bunch of stuff in the garage and I asked it it was for sale...sure enough, we ended up buying a very full truck load of furniture and household items!

It was so much fun going through all the stuff...even Mark was excited about it! :)
Hopefully we'll be able to do it again in the near future and keep my projects & store space full!

Monday, May 21, 2012

More vendor space...

 This week I opened up a 2nd vendor resale space. It is at a store called Ilona's Resale and is located close by my other space (7th Ave & Indian School). I'm excited to see how it goes, they have given me good feedback so far with liking my style and since opening on Thursday, I've sold 3 furniture pieces...Hopefully I'll be able to keep up. :)

And I'm still at Qcumberz also. My space has filled with lots of random stuff and is constantly changing. :)

Thursday, March 29, 2012

Great Buys!

I sold our bedroom furniture...a few month ago. I've never loved it and I was ready for a change. The problem was I never replaced it because I was always selling the dressers that I re-did. So we have had our clothes on the floor in piles for at least 2 months! 
It was our new normal...crazy. :)
 Well, a couple weekends ago I came across this beauty at a church yard sale and when I saw the price tag of $15 I had to have it! I decided to go with some color in our bedroom. It pops and I love it. I glazed the handles and some indention's on the dresser body to bring out all the details.
So glad to finally have a dresser again!

 I also scored this last weekend at Goodwill. I seriously had a shoppers high from my good deals. :)
I found this homemade bulletin board. I think it was a twin headboard possibly...I loved the style right away and when I saw the price tag of $5 I had to have it.

I added some fabric on top of the cork board  to clean it up a little and it is now on the wall in our office space. Since taking this picture, I added some hooks to the bottom and that is where I keep the kids' backpack. It is a perfect set up for us!

And this was my deal of the year, drum roll please....
I paid $12 for this leather chair!!! I was so excited. It needed some conditioning (which cost almost as much as the chair itself) but is in excellent condition. I have always wanted a chair like this!

Fun finds!

Evolution at Qcumberz

I always take a picture when I change things around at my vendor space at Qcumberz to remember what all I have. :) It is kinda fun to look and see how things have changed for the month. It has been going really good and I think I'll continue to do it. :)


I'm having fun shopping and love that I can bring a little extra money for our family!

Monday, February 27, 2012

My own space...

I have been researching and checking out different stores that I could sell the furniture that I re-do along with other stuff I find. I settled on Qcumberz (at 7th Ave & Indian School) and moved in yesterday! It is just a small 50 square feet space but I think it is perfect for me!

 I painted the wall a nice cheery color and gives a little pop to my black and white pieces.
I'm very excited to see how it goes!

Thursday, February 16, 2012

Full Bedroom makeover

Just some pictures to capture the full redo of the room. I built the beds and on the end of Cadence's bed I built on a desk area for her. Took down the dark shutters, painted the trim white and sewed some easy curtains with ribbon tie backs.


Since the beds took up more space in their room now I decided to use their closet space for some toy play area. Here is the before (it has a raised platform because a air conditioning vent goes through that space.


The dollhouse that Mark built fits perfectly along with the dress up clothes.


I also found this really great antique dresser for $50. I painted it and used black glaze to bring out all the detail. I love the way it turned out!


I finished the room up with some details with the names that my mom had made and were in the room previously. I added paper flowers and thumb tacked them into the wall. There are three different layers of scrapbook paper cut out in leave/flower pattern that lay on top of one another and then curl the edges just a bit and pin them into place.

I also found a hanging light chandelier (you can just see it in the top right of picture). I removed the wiring and candle stick like light bulb areas. I put a hook in ceiling and tied a pink long ribbon for it to hang down. I really like the added feature.

Close up of the flowers. :)


The girls like their new bedroom and I'm also really happy with the end result. A few more details and then I'll be done. Mostly just sewing a quilt for their beds. :)


New beds for girls


I finally finished up a bedroom makeover for the girls' room. I saw someone who had made beds that were made from pallets and thought to myself...I can do that! :) So after finding some pallets and some other salvaged wood I started building. Didn't really have a specific plan in mind...just kinda figured it out as I went along.


Only needed a chop saw & sander and of course a screw gun. I did end up having to buy a few wood supplies but in the end didn't spend more than $22!


Here is the work in progress.
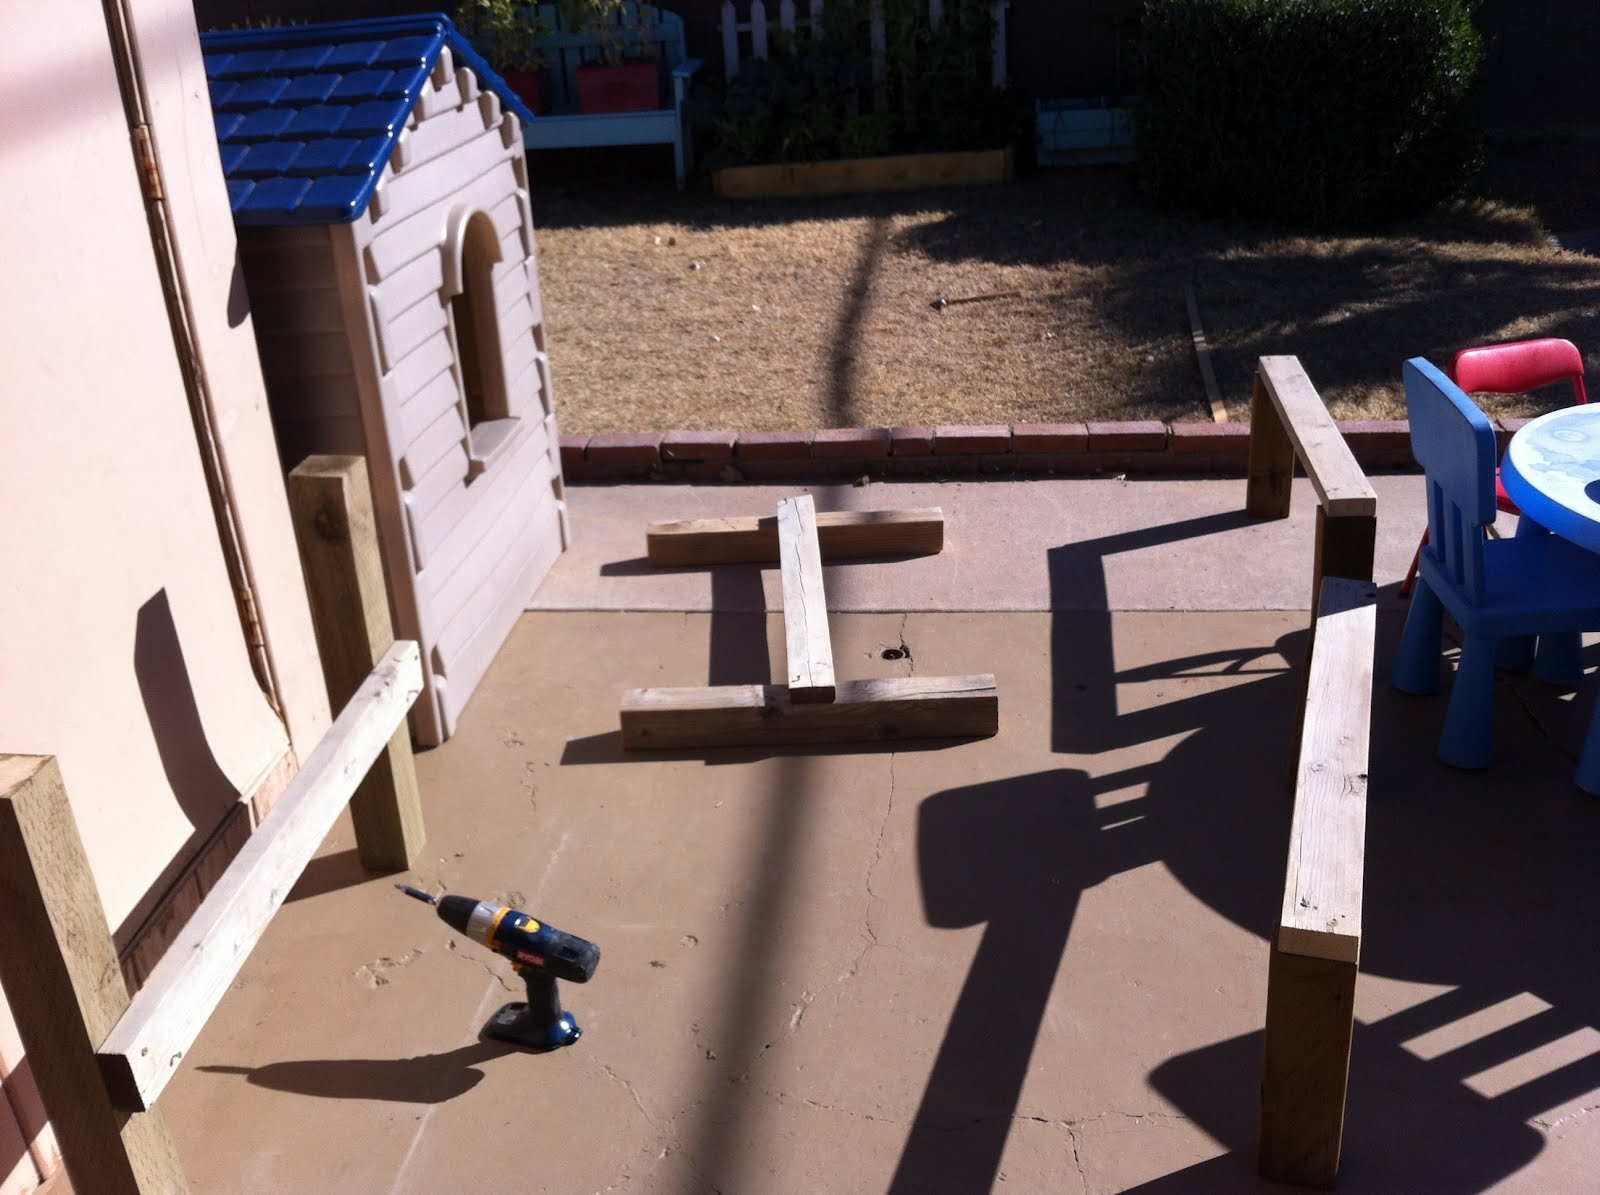
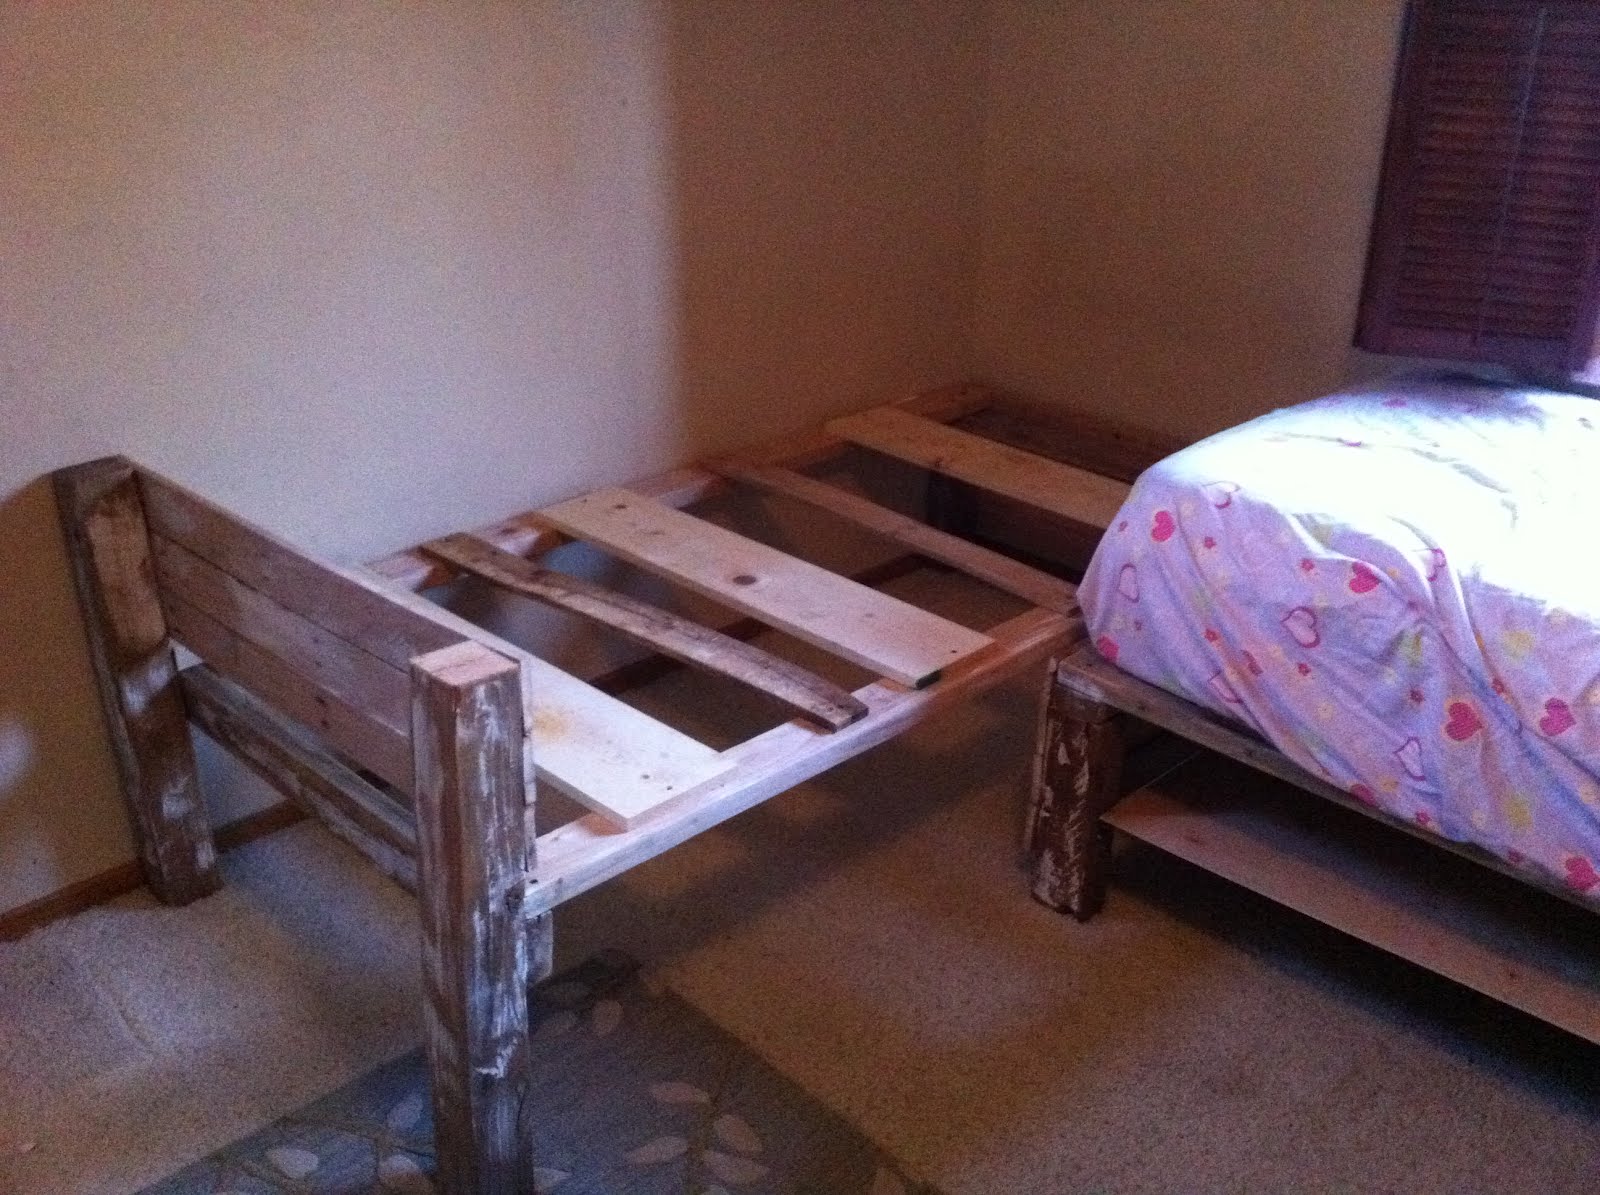
I got it together and thought I would just leave it rustic. I put a bit of paint on randomly and then sanded it off to just leave a touch of it behind.


Got it into their room and decided I didn't like how really rustic it was for what I wanted to do in there so took them back outside for a nice coat of paint and a few more finishing boards. Oh, and I had to add a diagonal board across the bed for support...they were a little too wobbly.


After a nice coat of paint they were back inside (sorry about the bad picture :))


Here is the final product. I added a shelf big board below one of the beds for the toy storage and left Cadence's bed (one on right) open space. The kids love crawling back there and using it as a hide out. :)


I'm happy with the way they turned out and am glad I gave a try at building something myself!

Tuesday, February 14, 2012

Swinging from the branches

I have had this rocking chair for many years now and it has gotten pretty wobbly recently. I saw the idea to make a chair swing (on Pinterest) and thought this chair would be perfect for a re-do. All I had to do was saw off the legs and I screwed a few boards to bottom for reinforcement and then drilled a couple holes in for the rope to feed through.

And...
here is our new chair swing. I love it!!
It's charming, peaceful and the kids love it.


Another reason to enjoy the outdoors. :)

Sunday, January 29, 2012

Closet Reading Nook

I saw the idea online to make a closet into a reading nook. Since we really only use Dylan's closet for storage I thought it would be a great idea for his room...and he also needs some motivation to read (it's not his favorite). :)


Here is the before picture of the closet.
And after...
I painted, made some curtains out of fabric I had (and made the rod out of spray painted pvc pipe...cost about $1.50), put fabric on shelf because of contact paper that was previously put on shelf and then painted over and it was impossible to remove. I fastened the fabric with push pins to front of shelf. And bought a chair from Craigslist.


It is a great little space and it doubles as a really cool fort area! Dylan enjoys the area and I even caught him reading by himself...and that never happens!!


Friday, January 20, 2012

Reclaimed wood projects


Last week or so bulk trash pick up was in our neighborhood...and anyone who knows me well knows I love to pick up stuff on the side of the road. :) I didn't find too much this time but I was inspired to make a bunch of decorative things with some reclaimed salvaged wood that was found in front of one of my neighbors houses. :)


The top is just a wood trim piece that I spray painted black and hot glued some clothes pins to (one for each kid) and then tied glass vases with some ribbon. Super simple and so cute. I like that each kid has their own drawn picture below their pictures. :)


And the hooks (from Ikea) I had for the kids' backpacks were a bit small, so once again just took a piece of wood and screwed holes in it and added some dresser knobs and the hooks that I already had.
I made these tree pieces (the trunk is each kids arm and hand) awhile ago and I had them in some black frames without glass (it is canvas with mod podge all over) but never really like the way it looked. So, since I love my pallet project I did so much I decided just to put some pallet wood together vertical as the backdrop. I love it so much!


And the last piece of wood was from what I think was a portion of a old drop leaf table, it had these really great old rusty hinges so I just took them off and reattached to the front for extra flair and again drilled holes and attached 2 drawer handles. Pulled a piece of fabric across and clipped some clothes pins on to hold the art!


Simple projects, FREE and I love that it adds more character to our house! :)